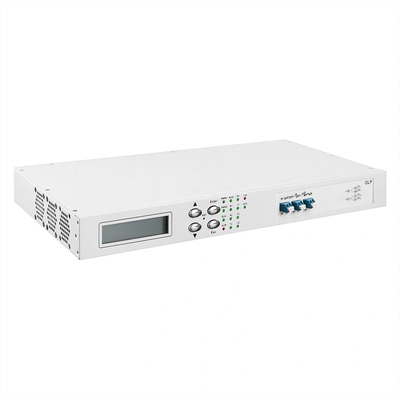
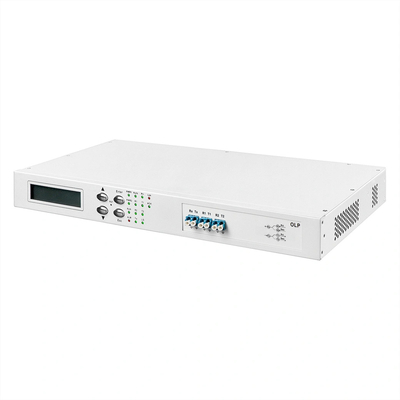
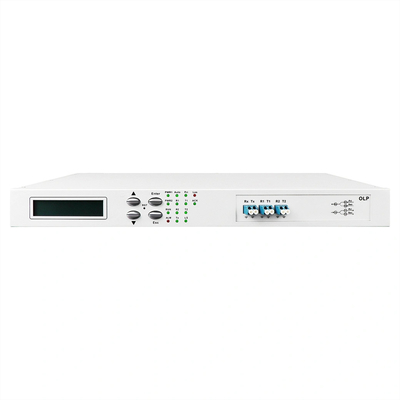
Olycom OLP optical fiber line protection system
Parameter
| Chassis |
Standalone 1U Chassis |
| Operating temperature |
-5℃~+55℃ |
| Relative humidity |
5%~95% non-condensing |
| Storage temperature |
-20℃~75℃ |
| Power supply |
AC 220V/50~60Hz, DC(-36~-72)V dual power supply |
| Dimension |
Standard 19' rack 1U (483*249*44mm) |
| Max power consumption |
40W |
Front Panel

Description
1) Optical interface description: The flange on the equipment panel is the signal interface.
2) When removing the optical fiber connection cable, cover it with a dust cap to prevent hard objects, dust or other dirt from touching, damaging and contaminating the optical output port.
3) LCD display: displays input and output optical power and other related information.
4) ▲——Up key; ▼——Down key; Enter——OK key; Esc——Cancel key.
5) RST: Supports hardware reset and hardware initialization by operating buttons.
Rear Panel

Description
1) The power supply (PIU) slot is on the back of the device, supporting AC (APU)/DC (DPU) optional, and 1+1 hot backup of the power supply.
2) Indicator light: PWR: on: normal power supply; off: no power supply or abnormality.
3) RJ45 Ethernet interface, RS-232 serial port: communication interface for device monitoring data information.
Key Features
- Shorten communication interruption time, improve maintenance efficiency, and automatically restore communication in a very short time
- Reduce various losses caused by line failures
- Increase the reliability of the transmission network and improve the service quality of operators
- Arbitrary scheduling of active and backup work routes (line maintenance, cutover scheduling) while ensuring no business interruption
- Support screen display, real-time monitoring of main and backup optical fiber optical power, and transparent transmission
- Support remote and short-range control of the entire system to facilitate equipment management and maintenance.
OLP: 1+1
Diagram

Specification
| Function |
Specification |
| Working wavelength range |
1260nm~1650nm |
| OLP Type |
OLP-1+1 (double transmission and selective reception) |
| Switching time |
<15ms |
| Introducing losses |
Working path |
<4dB |
| Alternate path |
<1.2dB |
| Monitor optical power range |
-50 dBm ~+25dBm |
| Optical interface |
LC/UPC (Optional) |
| Max power consumption |
5W |
| MTBF |
>100,000 hours |
Interface definition
| Interface |
Description |
Function/Connection |
| Rx |
OLP local output interface |
Connect to local device RX port |
| Tx |
OLP local receiving interface |
Connect to the local device TX port |
| R1 |
Main route receiving interface |
Connect to peer T1 |
| T1 |
Main route output interface |
Connect to peer R1 |
| R2 |
Backup route receiving interface |
Connect to peer T2 |
| T2 |
Backup route output interface |
Connect to peer R2 |
Indicator definition
| Interface |
Description |
Function |
| PWR1/PWR2 |
OLP power indicator |
On, OLP power supply is normal
Off, power supply failure
|
| RUN |
OLP system indicator |
On, the OLP is operating normally
Off, there is an operating failure.
|
| ACK |
OLP instruction return indicator |
On, there is an instruction to return
Off, there is no instruction to return.
|
| LOS |
OLP signal indicator |
On, the optical signal is lost
Off, the signal is lost
|
| ALM |
OLP alarm indicator |
No optical signals or abnormal input and output |
| Auto |
OLP working mode indicator |
On, working in automatic mode
Off: working in manual mode
|
| R1 |
OLP main route receiving indicator |
On, reception is normal
Off, reception is abnormal
|
| R2 |
OLP backup route receiving indicator |
On, reception is normal
Off, reception is abnormal
|
| T1 |
OLP main route output indicator |
On, the output is normal
Off, the output is abnormal
|
| T2 |
OLP backup route output indicator |
On, the output is normal
Off, the output is abnormal
|
| Pri |
Main route working indicator |
On, working on the main route |
Settings
1.Working mode setting
The device provides two working modes: manual mode and automatic mode.
The manual mode is used for device commissioning and forced switching.
(1) Select automatic and manual through network management;
(2) Select through the device button, long press the device panel button until the Auto light goes out (working in manual) or lights up (working in automatic)
After the operator completes the operation, the equipment should be placed in automatic working mode, otherwise protection failure accidents may occur.
Note: The device supports automatically returning from manual mode to automatic mode, and the return time is 5 minutes by factory default setting.
2.Main route settings
The device provides main route settings. Customers can select R1 or R2 as the main route according to needs; the factory default is R1 as the main route
3.Work route settings
The factory default R1 is the primary working route (Pri), and R2 is the backup working route (Sec).
When the device is in automatic working mode, the device will automatically select a working route based on line conditions:
(1) When only one route is available: work on the channel corresponding to the available route;
(2) When both routes are available: the route corresponding to the route that works first in time (if working on the backup channel, the device will automatically switch back to the main channel after 5 minutes, provided that the device is started the switchback function).
When selecting a route manually, set the device to manual mode and set the working route through the panel buttons or network management
4.Switch threshold power value setting
The initial switching threshold power value of the device is -30dBm. The user can make corresponding settings according to the type of device and the actual situation of the other party's line.
Basic principle: The switching threshold power value is slightly greater than the minimum received power value of the optical transmission equipment, and the difference is 0.5~1dB. (The minimum received power value is subject to ensuring normal transmission of the entire system service).
5.Switchback mode settings
Definition of switchback: In automatic mode, the device switches from the backup state to the main state. Can be set to "automatic switchback" or "automatic no switchback". In the "automatic non-switchback" mode, even if the switchback conditions are met (both the primary and backup routes are normal), the backup route will not be automatically switched to the main route.
6.Switchback delay setting
When the device is in the "automatic switchback" mode, the optical path is in the backup state, and the device is working in the automatic mode, the device will perform light detection on the main and backup paths in real time. If it detects that the optical power of the main and backup paths is within M time (0~999 minutes), the device will automatically switch back to the main road (Pri) state.
Application

Description
OLP TX is connected to the TX light-emitting port of the customer equipment
RX is connected to the RX light-receiving port of the customer equipment
R1 is connected to the opposite OLP device T1 through the optical cable
R2 is connected to the opposite OLP device T2
T1 is connected to the opposite OLP device R1
T2 is connected to the opposite end. OLP device R2 port


 Your message must be between 20-3,000 characters!
 Please check your E-mail!
  Your message must be between 20-3,000 characters!
 Please check your E-mail!
